Friday, December 18, 2015

Instructional: How to Print (and Clean Up Afterwards)

Here's a simple instructional video on printmaking. I've also posted some examples of printing projects below.

Important Vocab:
Printing Plate: Either Styrofoam or linoleum (rubber). Whatever you are "carving" into to make a design/picture.
Plexi Plate: The Plexiglas plate upon which you spread out the ink using a brayer.
Brayer: A "roller." What you use to spread around the ink once it's on the plexi plate.
Printing Ink: We have many colors! Only use a dime sized amount and do so with a palette knife.
Palette Knife: A white plastic knife used to get ink and place it on the plexi plate.  

And here's the link if you'd like to watch it on YouTube.

PLEASE NOTE:
You can print in any color (you don't need to use just black).
Printmaking works best for line-type drawings. Meaning, the more "expressive lines" you have, the better your print will be. Look at all the expressive and decorative lines in the prints below. Imagine how boring they would be without them. Lines add so much INTEREST!

An up-close of a linoleum block printing plate.
Look how much energy and focus the lines of the background add. They show your eye where to look. They tell you that the car is REALLY IMPORTANT! AND EXCITING!

Look how much ACTION the lines add to this already action-filled piece. The way the white background is carved out in an almost halo/sun-ray pattern around the bird tells your eyes that the focal point of this piece is the bird/alligator mouth. Lines are SO IMPORTANT!


Wednesday, November 25, 2015

Faux Stained Glass

This is the first year I am doing an art history class here at Wheeler (and here's the awesome website I created for the course). It's a great class because it's a unique group: those who like art AND like talking about history. We do a lot of looking at and discussion images and events from history, creating art in the style of the movement we're studying, and.... cooking up feasts that relate to our topic of study. It's fun!

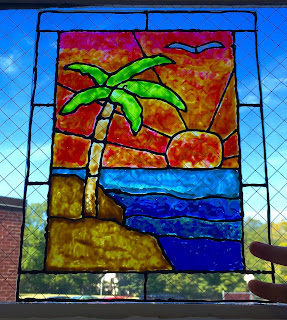
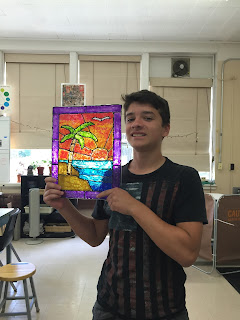
The first time period/movement we studied was medieval art in Europe (specifically Italy). Besides doing a presentation on a medieval artist of their choice, students were also required to complete an art project. Because stained glass was such a prolific art form in the middle ages, we decided to create faux stained glass pieces using a product called Gallery Glass. Below you can see the process, products, and pictures from our medieval feast day.

And in case you are interested in what we cooked.... Here is the recipe for medieval waffres, or "waffles"... except, they're made with about a billion eggs, ginger, and... cheese. But with chocolate chips, syrup, and whipped cream, they were pretty good!

Working on a beautiful representation of "hamsa," a sign of protection. 

Working on a composition featuring the Italian flag, theater curtains, and a family dinner table. 

Creating his perfect golf course. 

Making that perfect, relaxing, island paradise. 

Mountainous landscape!

This composition features a hand holding a pomegranate and musical bar featuring the seeds of the pomegranate as musical notes. 


Almost done!


About to start cooking!

Grating cheese for our... waffles!

Yum!

He ate all of our leftovers like a champ!

YUMMMMMMMMMMMM!

Tuesday, November 24, 2015

Drawing (UPSIDE DOWN) Portraits

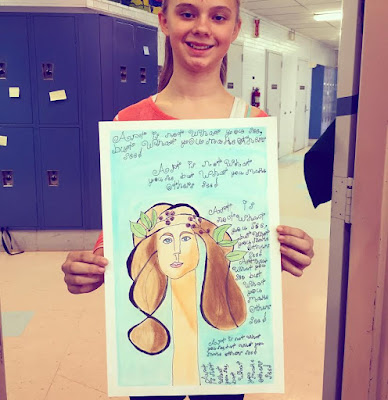
This year, I tried a brand new project. I knew it would be a challenge, and I wasn't sure how it would turn out; but, as usual, these kids blew me away with their effort, hard work, and ability. This project required students to draw a portrait... upside down.

The technique of drawing upside down helps students to focus on simple shapes and lines instead of being distracted by the complexity of, for example, "drawing a nose." In essence, this project "tricks" students into learning how to draw well.

Students began by choosing a drawing to draw upside down. Most of the drawings to choose from were line drawings by Picasso, although some students did choose their own drawings found online.

They then (begrudgingly) began to draw the drawing of their choice upside down. "Whaaaaaaattttt??!" and "You're kidding me.." were some of the exasperated comments made before students even began. However, as soon as they got into the swing of it, attitudes changed, and I actually wrote down what some students excitedly declared, such as:

"Now I know how to draw!"
"I know how to draw eyes now!"
"The hair came out amazing!"
"It gives me the feels!"

After they completed their upside down portrait line drawing, they could create any background they wanted, although they had to feature complementary colors in their composition. 8th grade used watercolor, while 7th grade used chalk pastel. Below, I'll take you through the process and show you some of the students' amazing results!


This student worked tirelessly on her composition. Like a real artist, she drew and re-drew. Her final product was incredibly beautiful and professional. 

Adding color to the portrait. FYI she's a lefty and managed to not smudge her chalk pastel. Let me repeat: She did not smudge CHALK PASTEL. EVERYONE smudges chalk pastel. Except this one! Way to go, girl!

Almost done!

Completed line drawing. 

Completed with color!!

Chalk pastel portraits and background patterns coming out beautifully! Look how focused they are!

The artist declared this "the best drawing I've ever made!!" Check out the cool rubbing alcohol drops in the watercolor background!

She worked incredibly hard on this portrait! The outcome was unique and beautiful! And such soft and peaceful color choices :)

Nice color choices and beautiful craftsmanship!

Amazing watercolor portrait of the Queen. Plus, the Queen's shoulders match up with the artist's! And check out those complementary colors! WHOA.

This dude has constellations as a background!

SO COOL!!!!
 
SO COOL AGAIN!!!!!!!!!!!!

So much going on in this portrait. So much emotion and strength!

Final projects on display (the one on the left is the completed portrait from the first picture!)! The rest are either in the cafeteria or library! Check them out!

Graffiti Lettering

For our first project at the middle school level this year, students learned about color blending, lettering, and craftsmanship. Students made personalized graffiti words that represented something about themselves. They are now hanging all over the cafeteria, bringing color and fun to all!


Wednesday, April 29, 2015

Fun Friday: Tie Dye

About every-other Friday, my high school classes are offered a "Fun Friday." Fun Friday exposes students to art forms they may otherwise not experience. This fun Friday, we did sharpie and rubbing alcohol tie dyed shirts. This form of tie dye is cool because you have a lot of control over the colors, shapes, and designed. Students experimented with the materials all class long and created some intricate and complex patterns and designs.