Wednesday, December 11, 2013

Marbling Paper (AKA The Best Day Ever)

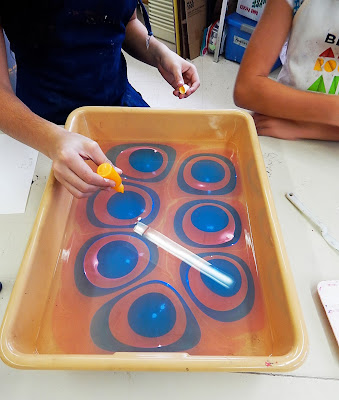
A good friend and fellow artist, Miss Molly Charest (of Carnivorous Books), came to school to teach seventh and eighth graders how to marble paper. And it was pretty much the best thing ever.


The process of marbling looks a bit like dropping food coloring into water. We began by gently dropping droplets of paint into a tub of water (well, special water). The paint expanded and grew and danced on the surface. Students added whatever other colors they wanted, and then used special rakes and other utensils to push and pull the design around (marbling it). A lot of students created very meticulous designs; others went all out and mixed, and mixed (and mixed).


Next, students gently placed paper (well, special paper) on the surface of the water, being careful to not press too hard. Essentially, this "prints" the paint from the water onto the paper. Finally, the paper was briefly rinsed and then laid to dry.


Overall, the process was really fun and experimental, and students achieved truly amazing results. Below are four beautiful examples from the eighth grade:


And finally, here is my new favorite video: two students experimenting with marbling paper for the first time. The best:


Saturday, December 7, 2013

Portrait Prints

This year, sixth grade learned about Die Brucke (literally: The Bridge), a small movement within the greater Abstract Expressionist trend in early 20th century Germany. Students and I mostly discussed why an artist would paint/print sad, abstract faces, when he could have very well painted realistically. Why go abstract? Why go sad? Students decided it was because the artist thought expressing emotion was more important than being realistic. Students also proposed that the artists may have been sad, depressed, etc. I think they were correct on both accounts.

Here are some examples of prints made by Die Brucke artists:


And here are some beautiful (and colorful) prints made by the sixth grade:


Friday, November 15, 2013

Fruit Monoprints

The sixth grade worked on monoprinting pictures of fruit. We first talked about how mono (monotone, monorail, monocle) means one. Usually, printmaking yields many prints (because you have a plate, from which you can print many images), but with monoprinting, it's a one-time deal. Only one print, then you start over. Also, to be successful, students had to work fast so that the paint wouldn't dry. It was a challenge for some of the more detail-oriented students!

Here's what we ended up with:


From left to right, these three avocados represent a student's first, second, and third try. Look how much better he got in just ten minutes! Amazing!

Another beautiful avocado.
 

Pear and banana.


Pineapple.
 

A (very) red apple.

Red pepper.
 

Wonderful watermelon.
 

This pictures shows the process. We painted on old transparency sheets, then pressed paper onto our painting, thereby printing the image.

Thursday, November 14, 2013

Ancient Map Project

This project was completely inspired by the students (sixth grade). We finished a project early one day, allowing for some free drawing time. Students took this opportunity to invent a new group drawing game, the outcome of which resembled an old map. With this in mind, we created our Ancient Map Project. Students worked in groups, developed a theme, and co-created these beautiful works of art.

Some students chose to rip the edges of their maps to create an even more old-timey effect. We all dyed our maps with coffee and tea, and then added watercolor to differentiate the land, for example, from the water. Most importantly, students learned that by closely observing something they wish to draw -- for example, a picture of a sea monster -- they can (with patience) draw a beautiful sea monster. Amazing!


Imagination Nation
 

Island of Doom


Land of Goonevil (ahem... "Good" and "Evil".. get it?)

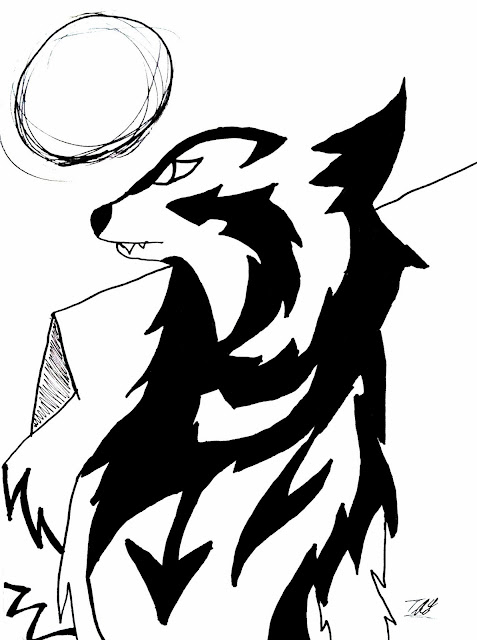
"Throw Me to the Wolves..."

A seventh grader brought this in to show me today. I asked her to write a brief paragraph about it so I could put it on the blog. Here's what she said: 
"I saw on Instagram a very inspiring quote: “If you throw me to the wolves, I’ll come back leading the pack.” My family is part Native American. I love my brother dearly and the idea of drawing a contour wolf came up when I thought of his name, “Howling Wolf.”
"I made a kind of contour drawing because we are working on that in art class. The whole wolf was made using mostly only one line. Everything is connected."


Friday, November 8, 2013

Leaf Art

The other day, I showed the seventh grade some examples of leaf art. Yes, you read that correctly: leaf art. Here are some examples:


The next day, one of my students came in and handed me this. She made it at home, after viewing the slideshow in class:


How awesome is that?! Come by the art room. It's hanging on the door, all laminated and pretty, for all to see.


Old Timey Silhouettes

For one of the first projects we did for Visual Art and Technology (a high school class), students created "Old Timey Silhouettes" of themselves using Photoshop. This project is really simple and works to familiarize students with basic functions in the program.

Here are links to the two tutorials from my YouTube channel that provide step-by-step instructions on how to complete this project. (And even though it's very step-by-step, everyone created a very different work of art, which was really nice to see.)

Step 1: http://www.youtube.com/watch?v=52m8HPaRirg
Step 2: http://www.youtube.com/watch?v=vqeGkocBd8M

And here are some beautiful examples:


Tuesday, October 22, 2013

8th Grade Studies Jan Hendrix

Jan Hendrix, a Holland-born artist, was the inspiration behind the 8th graders most recent work. Jan's artwork (click his name to visit his website) is heavily influenced by nature and features a beautiful, simple, and modern aesthetic. With his art, he explores printmaking, glass work, enamels, metal, painting, and more.

For this project, the 8th graders were asked to research his art and then make a work of art that was inspired by him.

Below you can find examples of the students' work. Again, to view Jan Hendrix's artwork, click on his name (Jan) above and it will redirect you to his beautiful website. All of the below works were created using various printmaking processes.


Monday, October 21, 2013

6th Grade Vases

The 6th grade learned about value (dark and light) and how to use it to make something look three-dimensional. We also learned how to apply (the illusion of ) light and shadow to make our art look more realistic. For this project, students each drew three striped vases. The stripes transition from dark to light in order to show shape and shadow. Then, student chose their best two vases, cut them out, and pasted them down on a large piece of back and white paper. 

This lesson was taken from Arte a Scoula's fabulous art blog. Thank you!


Wednesday, October 9, 2013

Stencils/Stained Glass

Using X-Acto blades, the seventh graders created beautiful "stained glass" stencils. We did this twice -- the first time, students simply cut a symmetrical design. The second version was meant to tell a story. We decided upon storytelling because we learned that one of the original purposes of stained glass was to tell stories!

Below you can find a few beautiful examples of their work: